I recently brought my Arduino development board out of storage. I last experimented with controlling electronic circuits months before our housing situation dramatically changed. Since the release of the Raspberry Pi (RasPi,) I’ve been inspired to research the DIY/maker scene again, and dreaming up several potential projects.
Things have changed a lot in a couple of years. There are faster, more advanced and less expensive hardware options for the Arduino platform. We now have affordable Linux-based computer/controllers with video, USB, networking and storage in addition to accessible general purpose input/output (GPIO.) An ebay search for “arduino” now yields thousands of items, starting at under a dollar, that can be used to enhance a micro-controller or discrete component based project. Accelerometers, sensors, motors, relays, displays, radio sets, cases, interfaces… the list goes on. Commonplace availability of serial-interfaced versions of all these devices is a particularly welcome development.
Serial Devices
Call me selfish, but I want to build some projects that can control LOTS of things, have neat buttons, dials, cool lights and displays. It’s honestly a big part of the appeal. Unfortunately, both the Arduino and the RasPi have limited input/output pins. Without a resorting to a few tricks, the options can run out quickly. Newer, serial-interfaced components only need 2 to 4 of a micro-controllers’ i/o pins, depending on the protocol. Even better, daisy chaining them allows many inputs, sensors, displays, relays, etc. to share those few pins, and opens up a whole lot of possibilities.
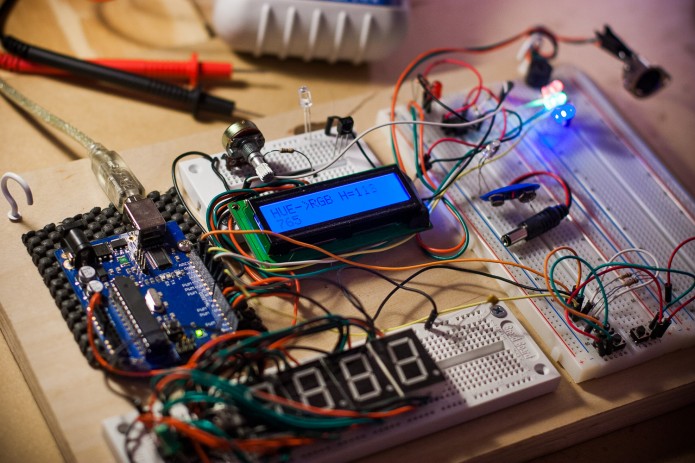
Why is this a big deal? The consider my Arduino dev board. This photo shows several native-interfaced or non-serial components in addition to the Arduino itself. Each component requires it’s own set of direct connections to the Arduino.

- 4 digit, 7-segment LED display and matrix control circuit (requiring 4 control pins, in addition to a bunch of extra wiring)
- 16×2 character LCD display (req. 6 pins)
- a few input switches (3 pins)
- infrared remote control i/o (2 pins)
- midi input (1 pin)
- RGB PWM LED output (3 pins)
That’s 19 pins! A basic Arduino only has 13 (there are analog inputs, but most of the libraries available to control displays and other devices do not use them.) What if I want another RGB LED? A relay or two?
Most of the newer, serial components communicate sharing 2 pins on an Inter-Integrated Circuit (I2C) bus. These are easily implemented with both Arduino and RasPi. One can readily find I2C controlled multi-digit 7 segment displays all wired up and ready to go for under $10, and LCD displays (with added 4-button inputs) for less than $25. There are real time clocks, relay boards, tiny gyroscopes, GPS devices, I/O expanders and all sorts of other relatively inexpensive goodies, all capable of sharing just a few of a micro-controllers’ pins.
LED Pixels
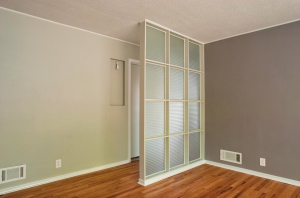
Jess and I have a few ideas for accent lighting around the house. Our living room features a floor-to-ceiling glass divider wall that seems perfect for an Arduino controlled LED project. A basic Arduino is limited to 6 PWM outputs. (Pulse Wave Modulation allows you to control the brightness of an LED by changing the length of time it is lit hundreds or thousands of time a second.) These six outputs pins are only enough to control two RGB LEDs.
Solving this problem is the LED Pixel. These are often sold as ‘ropes’ or strips of individually addressable RGB LEDs, connected in series, each passing along 4 wires (2 for power, plus data and clock.) Each pixel contains an integrated circuit that learns its position on the string, receives RGB values from your program or sketch, and outputs current-regulated PWM (millions of potential colors) to light red, green and blue LEDs. They can be chained together to make all kinds of projects from lighting effects to huge video walls.
Research into pixels led me to the $2.00 WS2803D, a DIP packaged (breadboard friendly) IC, and a cousin to the chips used in LED pixels. This chainable IC has 18 constant current PWM outs to drive high-brightness LEDs. That’s 6 RGB banks or 18 whatever per chip! I’m envisioning a bunch of evolving lights focused all over that wall… nothing as gaudy as the rainbow led strip pictured, but something cool.
New CPU Hardware
Of course some of the biggest news on the DIY/maker front has been the Raspberry Pi. Pi brings a lot to the table. Ethernet, cheap WiFi, SD Card storage, HD Video and so on. However, simply running Linux requires extra CPU cycles on top a project’s code. This overhead can effect the computer’s response time. The Arduino platform has seen some serious hardware advances, and is still preferred for projects requiring precise timing.
One of the most exciting new boards is the Teensy 3.0. This micro-controller brings the Arduino platform to a new level – for around $20. The developer of the Teensy is from the PDX area, and Kickstarter for the 3.0 was both inspiring and wildly successful.
Some Arduino Resources
http://tronixstuff.wordpress.com/tutorials/